

Inventor Tips & Tricks – Updating a Poor Camera Angle in a Presentation File
“Well, that doesn’t look right…” I’ve occasionally said to myself while working on an Inventor Presentation file. I know this probably doesn’t happen to anyone else, but sometimes I end up with a camera angle that I just don’t like when trying to display my tweaks. In the past, I’ve just deleted my carefully crafted, captured camera (say that five times fast) and started over. However, in a recent class this came up and as a group we decided to take a closer look.
During the Presentations class a student asked, “How do I adjust a captured camera, after I’ve created it?” I told him that I wasn’t aware of any method and unfortunately would have to delete the captured camera and recreate it. The student wasn’t an enthusiastic fan of this, and being as smart as they are, did a bit of digging into it and came up with a nifty solution. Since I’m always happy to learn new things, here is the workflow that we discovered!
First, here is an example file with the original captured camera. After thinking about it for a moment, I realize that I’d rather focus on a specific area for the screenshot. Unfortunately, that’s being controlled by a Captured Camera in the timeline and there’s no obvious way to adjust the timing…
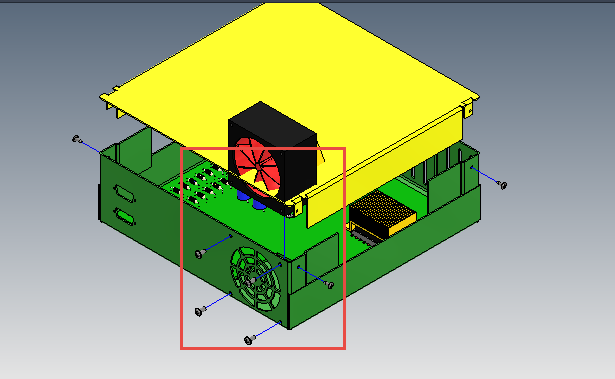 Area of Focus
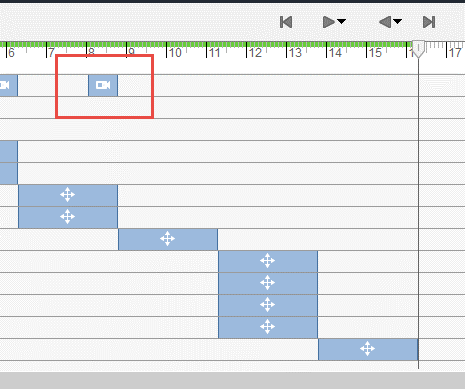 Controlling Captured Camera
While not completely obvious, thankfully there’s a simple way to update the Captured Camera. Please see the steps below:
-
1. Move the timeline marker to the very end of the desired camera glyph.
-
2. Zoom, pan and / or obit the model to the desired orientation and zoom level.
-
3. Click on the Capture Camera button in the ribbon.
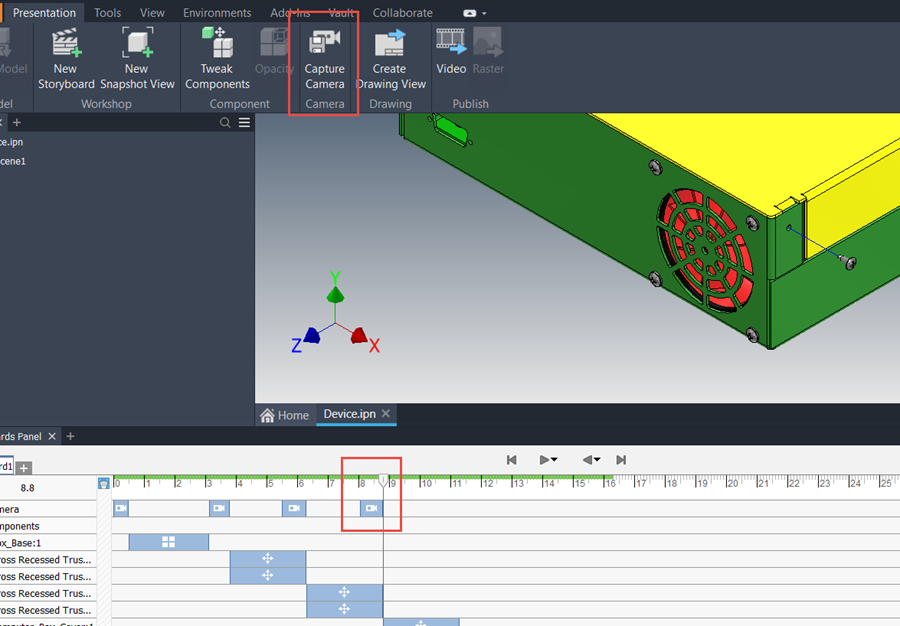
Screenshot of the Critical Components of the Solution
Yep, it’s that easy! I feel a little sheepish that I didn’t know that previously, but that is one of the reasons that I like teaching and collaborating with my clients. I’m ALWAYS learning from my customers and thankfully this CAD-dog isn’t too old to learn new tricks! Please let me know if you have any questions or comments. Happy blogging and have a most blessed day!
Link to YouTube Video:
Download the PDF file for this post!
Do you use any of these tips and tricks in your daily workflow? Feel free to brag about your success in the comments!
Like what you’ve read? Subscribe to our blog!
Feel free to share on Twitter or Facebook!


