

Navisworks - How to Export Useful Geometry from a Model
Every year or so, I’m asked how to export Navisworks geometry into a useful format for use in an Inventor design, or something along those lines. This is definitely possible, but involves a few steps, as Navisworks is not actually a CAD tool, but more of a project management / data aggregation tool. Navisworks can collaborate with most CAD and data formats, but highly compresses the files, allowing for larger models to be compiled. This also can make the geometry a bit “wonky” sometimes. However, we can extract useful model geometry if we utilize the following process.
Important Note: If you can obtain the original CAD models from the vendor or customer, you should do so. The original geometry will almost certainly be easier to work with.
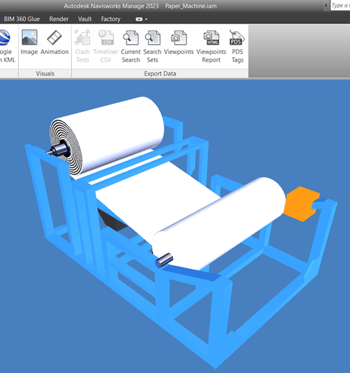
Original Design in Navisworks
Output Results in Inventor
The first step in the process is to export the file as an FBX file from Navisworks. I’ve used this format in the past to generate geometry and have achieved good results. Utilize the default settings, unless you really know what you are doing, and this process works best for individual pieces of equipment. Therefore, if you can break up the model, go ahead and do so. One can export a bigger layout of Navisworks geometry, but this will result in a larger output file size.
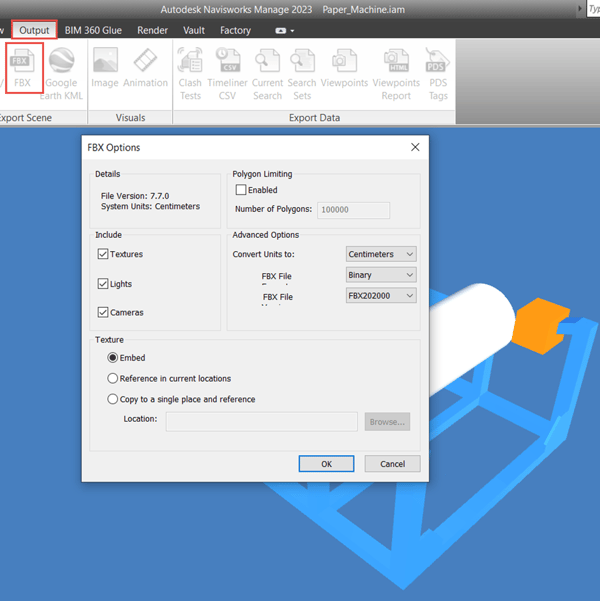
Export the Navisworks Model as an FBX File
Once the file is exported to the FBX format, the unexpected step in the process comes into play. Open up 3ds Max and import the file. 3ds Max has the toolsets capable of importing the FBX file and then exporting the geometry in a format useful to other CAD platforms. If you’re concerned about not knowing how to use 3ds Max, don’t be afraid, I really don’t either… We are only importing and exporting from 3ds Max in this workflow. Import the file using the File Tab >> Import >> Import… tool.
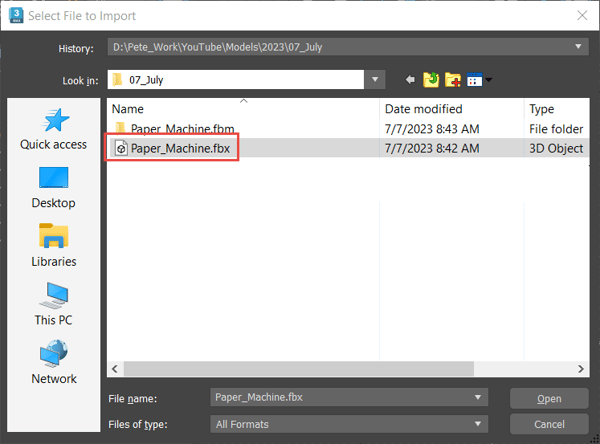
Import the Exported Navisworks FBX File
After importing the file, one simply has to export the file. The format I generally use is an OBJ format, which is a mesh format that Inventor and other CAD packages can easily open. However, if you are exporting for a different purpose, then choose SAT or STL. Again, I typically utilize the default values for the export. Export using the File Tab >> Export >> Export… tool.
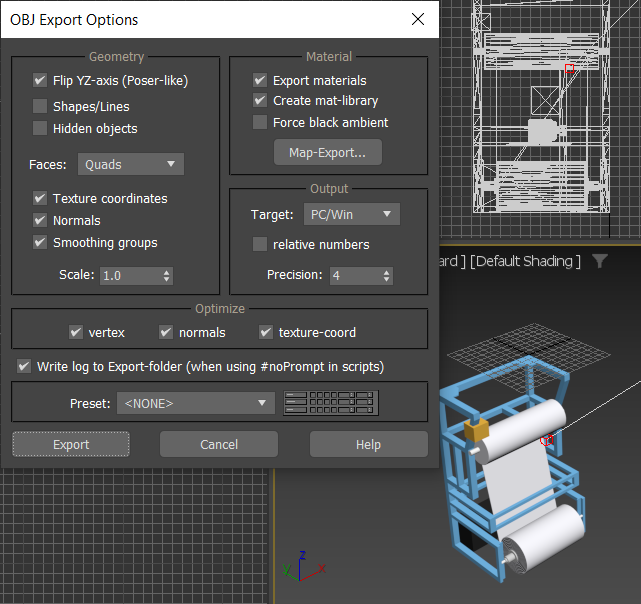
3ds Max OBJ Export Settings
Launch the CAD tool of choice, in my case Inventor, and open the OBJ file. You’ll immediately notice that the file may look a little strange to you; this is because it is a mesh file. However, you can still utilize this file in your Inventor designs, and I’ve even changed the color of the model in the image below.
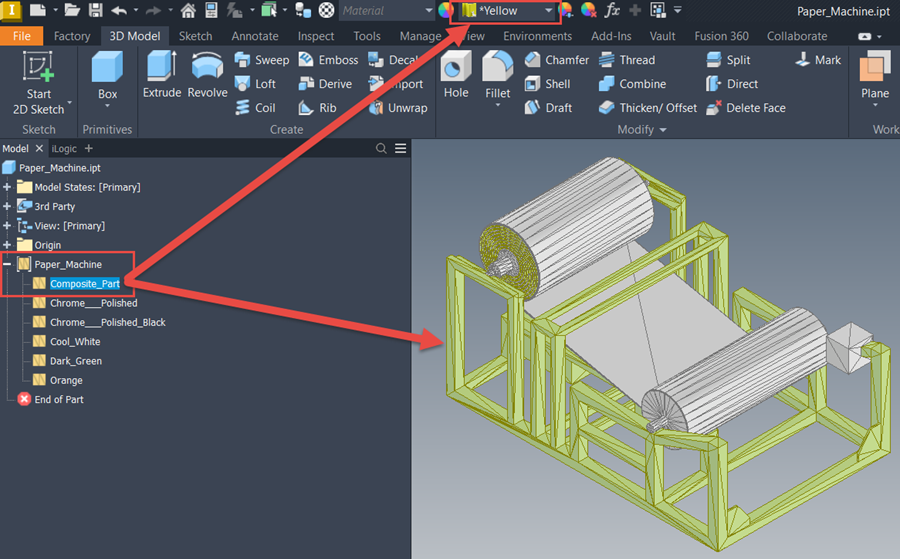
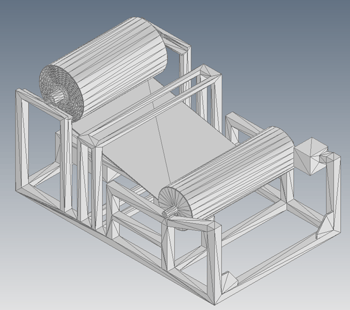
Resulting OBJ File inside Inventor
The process takes a couple of steps, but voila, there’s useful geometry at the end of the road. Please give the process a try and let us know how it goes. Of course, if you have any comments or questions, please let us know down below. Hope this helps and happy blogging!
Link to YouTube Video:
Download the PDF file for this post!
Do you use any of these tips and tricks in your daily workflow? Feel free to brag about your success in the comments!
Like what you’ve read? Subscribe to our blog!
Feel free to share on Twitter or Facebook!


