

In my last post, I showed how to more quickly access and create geometric constraints in an Inventor sketch by using an alternate Marking Menu (access by holding down the CTRL key + Right – Clicking on the mouse). This post will highlight an even more effective tip by demonstrating how to customize the primary Marking Menu to better suit your particular workflows.
As a refresher, when in various environments within Inventor, right – clicking on your mouse will display a menu of commonly used commands for that specific environment. These tools can greatly reduce the amount of time required to launch commands and improve the overall modeling experience. See the image below for an example of the Marking Menu in the Inventor sketch environment.
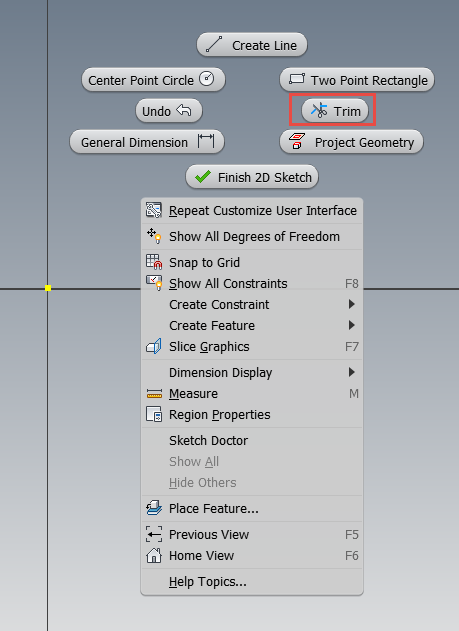
Right – Click Marking Menu for Common Sketch Commands
While this menu is very helpful, it can be made even more powerful by customizing the roster of available commands. Notice in the image above, that I’ve highlighted the “Trim” command. Personally, I very rarely use the “Trim” command, so I would rather populate that menu position with a command that I use more frequently, such as the “Two Point Center Rectangle” command.
To customize the Marking Menu, I first suggest that you launch the environment that you wish to modify which will save time. In this case, I’ll remain in the sketch environment. Next navigate to and launch the Tools Tab >> Options Panel >> Customize tool, as shown below.

Navigate to and Launch the Customize Tool
The Customize tool enables users to make changes to the ribbon menu (although the edits are no where near as robust as in AutoCAD), the keyboard shortcuts and the Marking Menu. Since I’m only focusing on the Marking Menu, I’ll click on that tab at the top of the dialog box. Be sure to verify that the proper Environment and Sub-Environment are selected. Sub-Environments are used when right – clicking with objects already selected. In my situation, I only want to access the 2D Sketch Environment with Nothing Selected. The final step is to select the tool position that is to be replaced and then select the replacement tool from the list at the right side of the dialog box.
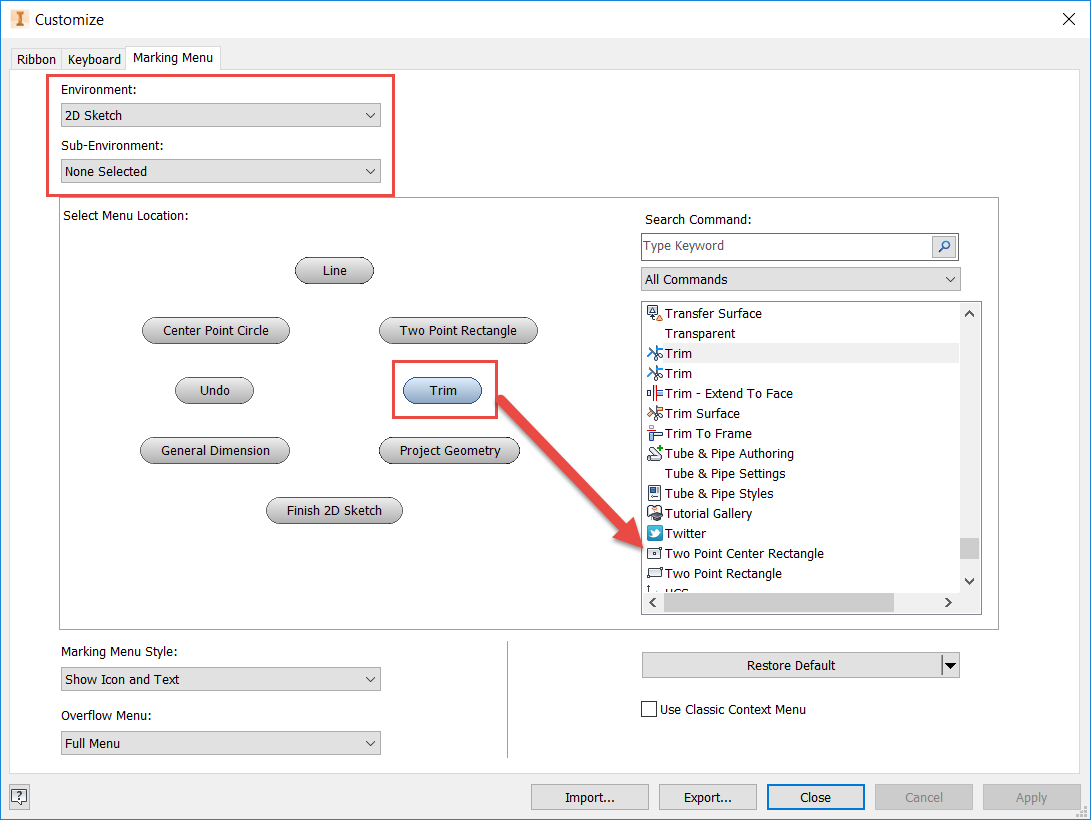
Replacing the “Trim” Command with the “Two Point Center Rectangle” Command in the Marking Menu
Always test out the changes to ensure that the settings are behaving as desired. In the image below, we can see the new command in action.

Marking Menu with the “Two Point Center Rectangle” Command
The final step in the process is an optional one, but it is a good idea to backup these customizations. That way, if they need to be reapplied or shared in the future, the backup can easily facilitate the transfer of these settings. To backup the Marking Menu customizations, click on the Customization tool once more. At the bottom of the dialog box, click on the Export option to create an XML backup of the settings, which I recommend storing on a network location. Just as easily, click on the Import option to find the proper XML file and load the customized settings.
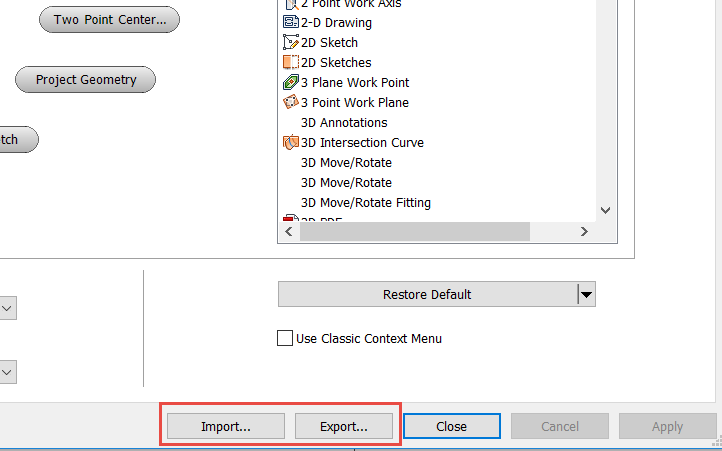
Export and Import Options for Storing and Recovering Marking Menu Customizations
So that’s it, nice and easy to do, but offering some powerfully customizable results. Take note of the commands that you find yourself using the most in various design situations and tailor the Marking Menu to cover these bases. I hope you’ve found this tip helpful and please do not hesitate to leave comments or questions below. Happy blogging and have a most blessed day! - Pete Strycharske
Do you use any of these tips and tricks in your daily workflow? Feel free to brag about your success in the comments!
Like what you’ve read? Subscribe to our blog!
Feel free to share on Twitter or Facebook!


