How do I get my toolbars to look like the classic AutoCAD?
METHOD 1:
The first method is for users who have a previously installed or have a custom toolbar saved:
1) Open a document or start a new file and click the Manage tab, then select Import
2) Make sure you are on the Transfer tab in the left pane:
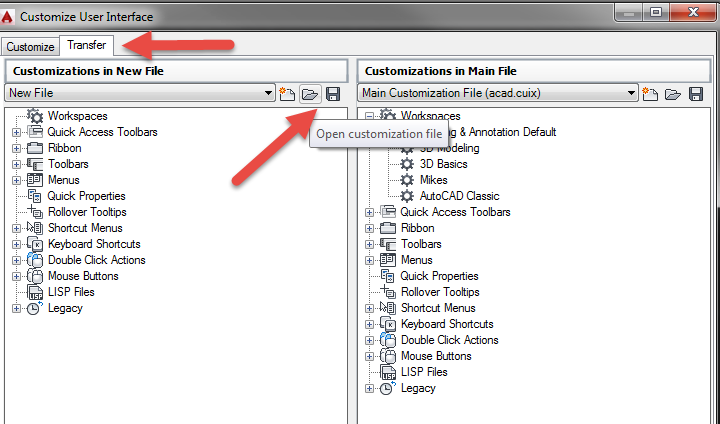
4) The old cui is located at c:\Users\(users name)\AppData\Roaming\Autodesk\AutoCAD 20xx\Rxx\enu\Support and is named acad.cuix or your custom named cui
5) Pick the name of the cui from the left pane under Workspaces and copy and paste it into the left pane under Workspaces. In the example below it’s called AutoCAD Classic
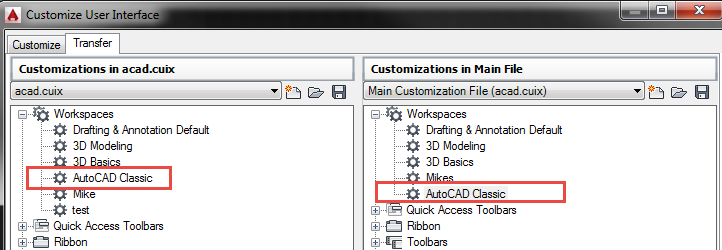
6) Select Apply and OK.
7) In the graphics area in AutoCAD type WORKSPACE then Enter followed by C and Enter.
8) Type AutoCAD Classic (or your old cui name) and hit Enter
METHOD 2:
The second method is for users who do not have a previous version installed.
1) Type –TOOLBARS at the command prompt (make sure you include the "-" )

2) Type STANDARD and hit Enter. This will bring in the Standard toolbar. NOTE: Do NOT hit Enter without typing Standard or you will insert every toolbar onto your screen

3) Right click on the Standard toolbar and you will see all the other toolbars to add:
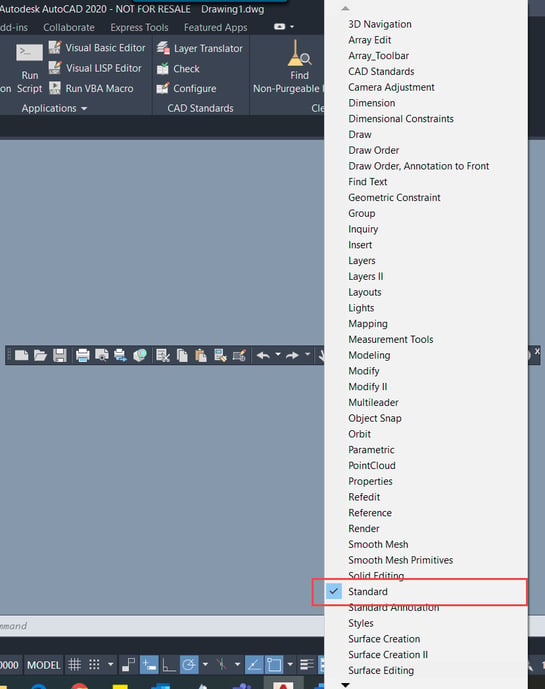
4) Continue right clicking and checking the toolbars you want to include on your screen

It is recommended that you save this to a customer workspace in case of software corruption.
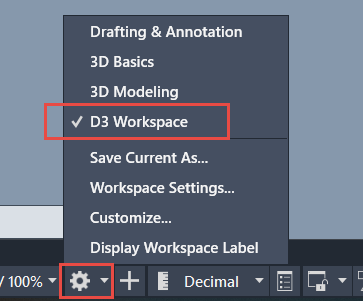
6) Select the Gear at the bottom right had side of the screen. Select Save Current AS… and name the CUI something like Classic or your company name.
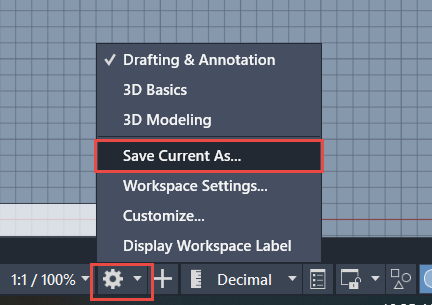

To see your named workspace select the gear and it should appear:
Like what you’ve read? Subscribe to our blog! Feel free to share on social!
Do you use any of these solutions or insights? Feel free to comment about your successes or struggles below!


